What Is VMware Migration?
VMware’s virtualization technology allows multiple virtual machines (VMs) to run on a single physical machine, sharing the resources of one computer across multiple environments. VMware migration typically has two meanings:
-
- Moving data, applications, and services from a VMware environment to another virtualization platform (migrating away from VMware).
- Moving workloads from a non-virtualized environment to VMware (migrating to VMware).
In this article, we’ll focus on the first meaning. Many organizations are considering migrating away from VMware in light of its acquisition by Broadcom and changes to its licensing model. We’ll provide key considerations for this type of IT migration and an example migration process.
This is part of an extensive series of guides about hybrid cloud.
Why Migrate from VMware?
The decision to migrate from VMware to alternative platforms is usually not driven by inherent shortcomings in VMware technology itself. VMware continues to be a mature and reliable solution virtualizing modern applications. The primary considerations for migration often relate to cost-effectiveness, scalability, and concerns about the future development roadmap.
Table of Contents
ToggleA significant factor influencing the current reassessment of VMware as a preferred platform is the recent acquisition of VMware by Broadcom. This development has introduced uncertainty concerning the future direction of VMware’s product management. Customers have expressed concerns about potential changes in product offerings, licensing terms, and pricing models that could arise from this new ownership.
According to Forrester, 20% of VMware enterprise customers are expected to migrate away from VMware. The primary reasons include historic price hikes, degrading support, and the company’s policy to require subscriptions to software bundles which may not be required by all organizations, such as NSX and Aria Suite.
VMware Migration: VMware Alternatives
Here are some of the main alternatives to VMware.
Cloud-Based VM Hosting
Cloud-based VM hosting provides scalability, flexibility, and cost-efficiency by hosting virtual machines in the cloud. This option allows organizations to pay only for the resources they use, unlike in-house servers that require upfront capital and continual maintenance.
Leading providers like AWS, Azure, and Google Cloud offer robust VM hosting services that include automated backups, enhanced security, and global reach. Such services accommodate rapid scaling and ensure high availability and disaster recovery. The pay-as-you-go model shifts capital expenditure to operational expenditure, reducing the total cost of ownership and allowing more predictable budgeting. All cloud providers provide automated tools that make it relatively easy to import existing VMware virtual machines into their environments.
Open-Source Virtualization
Open-source virtualization technologies such as KVM (Kernel-based Virtual Machine) and Xen provide cost-effective and flexible alternatives to proprietary solutions like VMware. These platforms offer the core benefits of virtualization without the licensing costs associated with commercial software. They are backed by strong communities that continually contribute enhancements and security updates.
These technologies are highly customizable, catering to specific needs and integration requirements of businesses. They support various operating systems and hardware configurations, making them useful for companies that seek to avoid vendor lock-in and maintain control over their virtual infrastructure.
Commercial Virtualization Alternatives
Proprietary on-prem virtualization solutions, such as Microsoft Hyper-V and Citrix Hypervisor, remain popular choices for organizations not ready to move to the cloud. These platforms offer deep integration with existing IT environments and come with extensive support and security updates from established vendors.
These technologies are equipped with advanced management tools to simplify VM operation and maintenance. They also provide robust security features, including hardware-based isolation and encrypted state files, essential for enterprises handling sensitive data within their premises.
To successfully migrate VMware to AWS, VMware to Nutanix migration, migrate VMware to Hyper V or even VMware migration to Azure, it’s crucial to use the right VMware migration tool and develop a solid application migration strategy.

Lanir specializes in founding new tech companies for Enterprise Software: Assemble and nurture a great team, Early stage funding to growth late stage, One design partner to hundreds of enterprise customers, MVP to Enterprise grade product, Low level kernel engineering to AI/ML and BigData, One advisory board to a long list of shareholders and board members of the worlds largest VCs
Tips from the Expert
In my experience, here are tips that can help you effectively migrate away from VMware to alternative platforms:
-
Conduct a comprehensive assessment first
Evaluate the existing VMware environment, including workloads, dependencies, and performance needs, to identify the best migration approach and target platform.
-
Develop a phased migration strategy
Start with low-risk applications and workloads, moving incrementally to ensure minimal disruption and allow for adjustments.
-
Leverage hybrid environments during transition
Utilize hybrid setups to run new and legacy systems side-by-side, ensuring service continuity.
-
Use automation tools for efficiency
Automate repetitive tasks like data transfer and application reconfiguration to reduce errors and save time.
-
Plan for robust testing and optimization post-migration
Rigorously test applications and infrastructure on the new platform to optimize performance and address any issues early.
How to Migrate from VMware: Key Steps
Here’s an overview of the key steps involved in migrating systems from VMware.
1. Comprehensive Backup and Documentation
Start with a comprehensive backup of all virtual machines, including all data, applications, configurations, and network settings. Use VMware’s native tools or third-party solutions like Faddom, which can scan a data center and identify VMware workloads and their dependencies in minutes.
Document every aspect of the current environment, such as software versions, hardware configurations, network topology, and security settings. This detailed documentation serves as a roadmap for setting up the new environment and is important for troubleshooting post-migration issues. Ensure the backups are stored in a secure, easily accessible location and test the restoration process to confirm data integrity and functionality.
VMware Migration Made Easy with Faddom
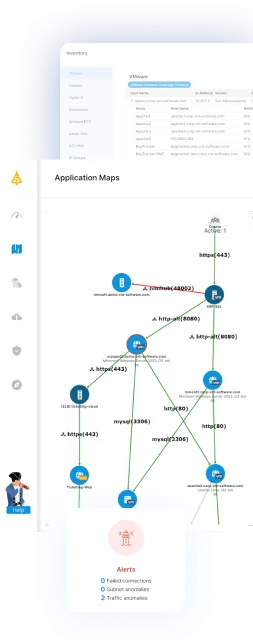
Faddom’s application dependency mapping provides critical information you’ll need before migrating VMware workloads, automatically discovering all VM instances and their dependencies. Whether for application migration or infrastructure upgrades and more, Faddom is agentless and doesn’t require credentials to scan your environment. It is cheap, starting at $10K/year, and maps the entire environment in real-time, automatically updating maps 24/7. One person can map an entire data center in an hour.
Learn more about Faddom for data center migration or try it yourself with a free trial
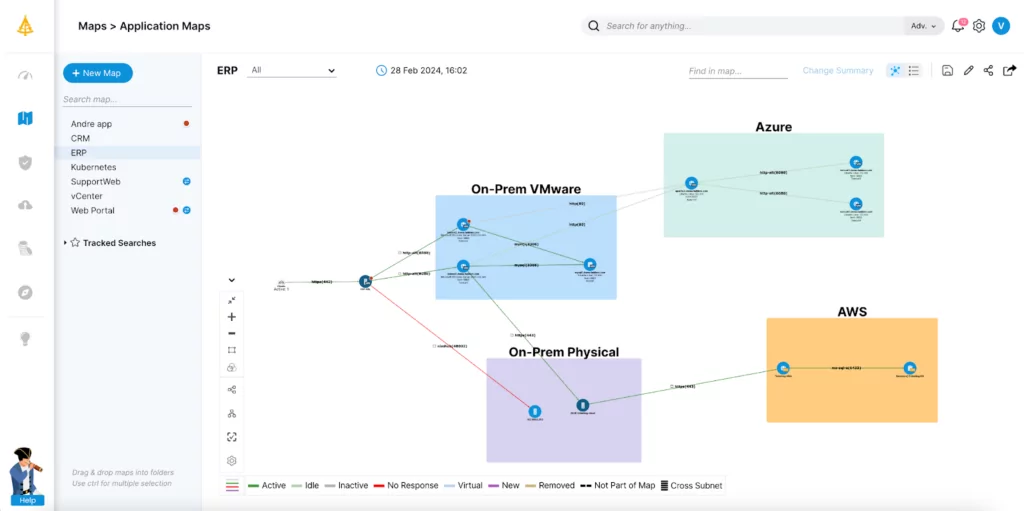
Leveraging advanced application migration tools and utilizing VMware live migration ensures minimal downtime, allowing for seamless transitions across platforms.
Learn more in our detailed guide to application migration checklist.
2. Choose the Right Target Platform and Setup
Selecting the right target platform for migration involves evaluating technical requirements, performance criteria, and financial implications. Consider platforms like AWS, Azure, or Google Cloud for cloud-based solutions, or alternative on-premises solutions like Microsoft Hyper-V or KVM for those needing closer control over their data. Assess the compatibility of these platforms with existing applications and workloads.
Next, begin the setup by installing the necessary virtualization software and configuring network settings, storage systems, and compute resources according to the documented specifications from the original VMware setup. Prepare the environment with adequate security measures and management tools to enable the smooth operation and maintenance of the migrated VMs.
3. Data and VM Migration
For data and VM migration, leverage automated migration tools that support live transfer capabilities, minimizing downtime. Tools such as VMware vMotion or third-party software designed for cross-platform migration can handle the complexities of live data transfer. Execute a pilot migration first, starting with less critical data or applications to validate the process.
During the migration, maintain a rigorous monitoring protocol to immediately address any issues that arise. Ensure that the migration tool aligns with the security protocols of your organization, using encryption for data in transit and conducting integrity checks to ensure that the data arrives unaltered.
4. Environment Configuration and Integration
Post-migration, configure the new environment to mirror the VMware setup as closely as possible. This involves detailed configuration of virtual networks, security settings, and storage options. Integration efforts include updating or replacing drivers and software to ensure compatibility with the new platform.
Conduct performance tuning to optimize resource allocation and efficiency. Regularly update system documentation throughout this process to reflect any new configurations and settings. Integration testing, involving end-users where possible, helps confirm that all systems operate correctly and interact seamlessly with one another.
5. Testing and Transition
In the final stages, conduct extensive testing to ensure every component of the migrated environment functions as intended. This includes load testing to assess performance under typical and peak conditions, and security testing to validate compliance with organizational standards. Address any discrepancies found during testing and document any changes made.
Once testing confirms stability and performance, begin the transition phase by gradually phasing out the VMware environment. This phased approach allows users to adapt to the new system with minimal disruption. Provide comprehensive training sessions and resources to IT staff and end-users to help them adapt to the new environment.
Example Migration Process: Migrating from VMware to KVM with Virt-Manager
Here’s a brief tutorial on how to convert virtual machines from VMware to KVM using the open source tool virt-manager.
Prepare the VMware Environment
-
- Install KVM on the target host. Ensure that the host machine has the necessary hardware support for KVM, such as VT-x or AMD-V.
- Install Virt-Manager or another KVM management tool to help with the migration process.
Export VMware VMs
-
- Use VMware’s vSphere Client to export the VMs you wish to migrate. This is done by selecting the VM, then choosing “Export” to generate an OVF or OVA file, which includes the VM’s configuration and virtual disks.
-
- Ensure all data and settings are captured during the export to avoid missing critical information during the migration.
Convert VMware Disks to KVM Format
-
- VMware VMs use VMDK files for virtual disks, while KVM uses QCOW2 or RAW formats. You can convert VMDK files to QCOW2 using the qemu-img tool.
The conversion command is:
qemu-img convert -f vmdk -O qcow2 source.vmdk destination.qcow2
Repeat this process for each virtual disk associated with the VM.
Create a New VM in KVM
-
- Using Virt-Manager or another KVM management interface, create a new VM. When prompted for the disk image, select the QCOW2 files created during the conversion process.
- Configure the VM’s CPU, memory, and network settings to match the original VMware VM as closely as possible.
Import the VM Configuration
-
- If the exported OVF file contains VM configuration details, you can use tools like virt-v2v to import these settings into KVM. This can help ensure that network settings, resource allocations, and other configurations are correctly replicated.
The virt-v2v command might look like this:
virt-v2v -i ovf vm_export.ovf -o local -os /var/lib/libvirt/images
Adjust and Test the VM
-
- Boot the new VM in KVM and check for any hardware or software issues. This includes ensuring that all device drivers are functioning correctly and that network settings are properly configured.
- Perform thorough testing to confirm that the VM operates as expected. This includes verifying application functionality, network connectivity, and data integrity.
Optimize Performance and Complete the Migration
-
- Optimize the VM’s performance by adjusting resource allocations, such as CPU and memory, within the KVM environment.
- Once testing is complete and the VM is confirmed to be stable, decommission the original VMware VM to complete the migration.
Related content: Read our guide to VMware vs KVM
Conclusion
Migrating from VMware to an alternative platform like KVM involves meticulous planning and execution. The process includes comprehensive backups, detailed environment documentation, choosing the right target platform, and using appropriate migration tools. Post-migration, it’s crucial to configure and integrate the new environment thoroughly, followed by extensive testing to ensure seamless operation.
Learn more about Faddom for data center migration or try it yourself with a free trial!
See Additional Guides on Key Hybrid Cloud Topics
Together with our content partners, we have authored in-depth guides on several other topics that can also be useful as you explore the world of hybrid cloud.
Cloud Migration
Authored by Faddom
- [Guide] Data Center Migration: Complete Guide 2025
- [Guide] Cloud Migration to AWS: 3 Phases, 7 Rs and 5 Free Tools to Get You Started
- [Blog] How Secure is the Cloud?
- [product] Faddom | Instant Application Dependency Mapping Tool
Nutanix
Authored by Faddom
- [Guide] Nutanix: History, Products, and Top 5 Alternatives
- [Guide] Nutanix vs. VMware: 5 Key Differences and How to Choose
- [product] Faddom | Instant Application Dependency Mapping Tool
Kubernetes Architecture
Authored by Komodor
